Spinach, Mushroom, and Feta Muffin Frittatas

Three of my current obsessions include food in muffin form, feta cheese, and dishes that are quick and easy to make.  Making anything in the form of a “muffin” automatically makes it more fun to eat, feta cheese adds a delicious bite to almost anything, and lately, I just don’t have the time or energy to cook elaborate meals.

Breakfast for dinner is pretty much the best lazy girl’s way of cooking and eating a healthy, filling, and varied meal.  And these spinach, mushroom and feta frittatas are clearly a manifestation of my three current obsessions.

IMG_1055

The inspiration for these came from Pinterest- yet another recent obsession.  I think I officially have an obsessive personality.  That’s ok- there are worse things to be addicted to than Pinterest and feta cheese, right!?

These frittatas are so simple to make.  The feta/spinach/mushroom combo was fabulous, but so many other mix-ins could work as well.  Sun dried tomato and feta or broccoli and cheddar cheese would be great twists.

Spinach, Mushroom, and Feta Muffin Frittatas

Yield: 9-10 muffins

Adapted from: The Manila Spoon’s Recipe

Ingredients:

  • 1 Package (8 oz) baby bella mushrooms, finely diced
  • 1 Package (5 oz) baby spinach
  • 1 cup feta cheese
  • 4 Lage eggs
  • 1-2 TBS olive oil
  • Salt and pepper, to taste

Instructions:

1. Preheat oven to 375 degrees.

2. Clean mushrooms by wiping them with a damp paper towel, then finely dice them.

IMG_1041

3. Heat olive oil in a large skillet on medium heat and add mushrooms.  Cook mushrooms for about 5-6 minutes, then remove from heat and set aside.

IMG_1042

4.  In the same skillet the mushrooms were in, add the spinach and a few TBS of water.  Allow the spinach to wilt over medium/low heat for a minutes until it is all shriveled an wilted.

IMG_1043

IMG_1044

5.  Remove spinach from heat and allow to cool slightly.  Then, gently blot spinach with paper towels to remove any excess moisture.

6.  In a large bowel, whisk the eggs, then add the mushrooms (not including any liquid they released during cooking), feta cheese, and spinach.  Stir to combine.  Add salt and pepper to taste.

IMG_1045

IMG_1047

7. Spoon mixture into a non-greased muffin tray.  Bake in the oven for about 20 minutes, or until a toothpick inserted comes out clean.  Allow to cool in tin for a few minutes, then enjoy :)

IMG_1048

IMG_1049

These stay  fresh for a few days wrapped and refrigerated, so they also make the perfect grab-and-heat breakfast or light snack.  A weeknight meal that is easy, fun, and healthy?  Yes, please!

IMG_1054

IMG_1056

What are your favorite ways to enjoy breakfast for dinner?

What are your favorite foods to make in fun forms?

Garlic and Herb Pasta with Chicken, Shallots, Tomatoes, and Feta Cheese

Last weekend I stumbled upon a cute little farmers market in my area.  One of the vendors was called Pappardelle, who specializes in homemade pasta.  They sell pasta in all different flavors; ranging from chive and lemon to sun-dried tomato.  We picked up a simple ‘garlic and herb’ linguine, and have been anxious to try it out ever since.

IMG_0998

IMG_0999

IMG_1001

Aren’t the hooks so cute!?

It was hard for me to find a true “recipe” to use this pasta in because the pasta already has so many flavors- garlic, thyme, rosemary- in it.  So, I actually did something I rarely do and made my own concoction.  I am obsessed with onions and cherry tomatoes, and the Liberty on Less blog inspired me to add feta cheese.  Really, how can you ever go wrong by adding cheese?

I heated minced shallot and ginormous, plump cherry tomatoes in a little EVOO on low heat for about 15 minutes, until the cherry tomatoes were just about to burst.

IMG_0994

Thank you Fresh Market for these beauties.

IMG_1006

As that was heating, I boiled the pasta and grilled some chicken breasts seasoned with rosemary and crushed black pepper.  I then topped the pasta with the warm tomato mixture, grilled chicken, and sprinkled in some a ton of feta cheese.  I actually meant to drizzle some more olive oil on the finished product but forgot to.

IMG_1003

The verdict?

Eh.

I was very pleased with the flavor combination of chicken/tomatoes/feta/shallots, and my improvisation of ingredients.  Yay me.

However, I was very unimpressed with the pasta.  I’m sorry but $5-$6 for 8.oz of pasta is insane as it is, but this “flavored” pasta was BLAND!  I was so really hoping that this pasta would be a farmers market “gem” of mine, but it definitely was not.  I certainly would not recommend this pasta, or at least this flavor, to anybody.  Bummer.

2 morals to this story:

1. Save your bucks for uber fresh produce at Farmers Markets and stick to good ol’ supermarket pasta.

2.  Feta and tomatoes are amazing together,and make any meal better.

Disclaimer: I booked two (yes two!) vacations last night, both in the month of May.  Translation: time to get in shape!  So, don’t be surprised if the food featured on here gets kicked up a notch on the health scale.  (Even though I try to be healthy anyways)

I hope everyone is having a great week and your meals are turning out a bit more satisfying than mine.

xx

Dijon Crusted Baked Halibut

Hello blog peeps- I am officially back to a semi-normal routine and finally had the time to cook up a healthy, tasty meal tonight.

Because it has been a while since I tried a new recipe, I figured I would come back in full force and try something a bit out of my comfort zone.  Fish is one of those things that I am gradually developing quite a taste for, but am still reluctant at trying new types.  My taste buds have mastered salmon (especially my yummy blackened salmon) and tried grouper and chilean sea bass while dining out, but I am not quick to try new fish recipes at home.  I mean, is anything less satisfying after a long day than a bland, fishy, expensive piece of fish?  Well, tonight was time to execute one of my foodie resolutions in trying new things.

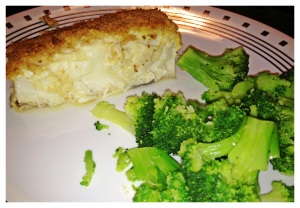
I made a dijon crusted baked halibut that I am happy to report turned out quite tasty!  I adapted the recipe from this Taste of Home Recipe by tweaking it just a little.  I decided to use halibut instead of tilapia because 1) fresh, wild halibut is on sale this week at Whole Foods (score!), and 2) I had never tried halibut before.

IMG_0950

I know I mention on here rather frequently whether or not my boyfriend liked a dish, but that is because he is a picky eater when it comes to healthy food.  So, I feel a recipe is uber-legitimate and totally worth sharing with you guys when he likes it.  And such was the case tonight :)

Dijon Crusted Baked Halibut

Adapted from this Taste of Home Recipe

Serves: 2

Ingredients:

  • 2/3 lb halibut (or fish of your choice)
  • 2 tablespoons reduced fat mayo (can sub with all or some greek yogurt)
  • 1.5 TBS parmesan cheese, divided
  • 2 tsp lemon juice
  • 3/4 tsp horseradish
  • 1 tsp butter, melted
  • 2 TBS breadcrumbs
  • 1.5 tsp dijon mustard

Instructions

  1. Preheat oven to 425 degrees.
  2. In a smal bowl, combine the mayo (or greek yogurt), 1 TBS parmesan cheese, lemon juice, and dijon mustard.
  3. Place fish on a baking sheet lined with aluminum foil and coated with cooking spray, skin side down.  Spread mayo mixture liberally on top of fish, saving any extra to use as a dipping sauce.
  4. In another small bowel, combine breadcrumbs, remaining 1/2 TBS parmesan cheese, and the melted butter.  Mix well.
  5. Top of the fish with the breadcrumb/cheese/butter topping.
  6. Bake in the oven for about 13-17 minutes, checking at 13 minutes, until fish is flaky in the center.

IMG_0951

We were pleasantly surprised at how good and EASY this recipe was.  I served it with frozen steamed broccoli (yawn), but tons of side dishes would accompany this perfectly.

The only thing I noticed was that because halibut (or perhaps just this piece) is such a thick piece of fish, we didn’t get a yummy dijon flavor in every bite, especially towards the center.  Luckily halibut is a very taste neutral fish, so it was more not flavorful as opposed to bad.  My solution to this for next time: reserve the extra mayo mixture to use as a dipping sauce.  If I had known this, I definitely would have saved my extra instead of tossing it down the drain in an attempt to be ahead of the clean up game.  Topping that reserved mixture with fresh herbs, such as dill or parsley, could be beyond delicious.

The next time you are looking for a healthy, delicious, out-of-the-box seafood recipe, definitely give this a try!

What is your favorite type of fish to cook?  What fish have you always wanted to try to make at home?

White Bean Chicken Chili

Sometimes, trying new recipes can be exhausting.  Sometimes, after a tedious, never-ending day of work and chores, you just want to come home and cook something reliable. Something that you know will turn out delicious and requires minimal work.

Those are totally the kind of days weeks I’ve been having.  This white bean chicken chili is one of our all time favorite recipes for a few years now.  It is filling, healthy, oh-so-tasty, makes enough for about 6-7 meals, inexpensive, and not terribly time consuming.  This chili is essentially the ‘total package’ of dinners.

IMG_0751

I found it a few years ago on AllRecipes, and have adapted it over time based on personal tastes and reviewers suggestions.

White Bean Chicken Chili

Adapted from this AllRecipes recipe (I promise my changes are better- they have been years and 30 batches in the making)

You Will Need:

  • 2 TBS olive oil
  • 1 large onion, chopped
  • 3 cloves garlic, minced
  • 1 (14.5 oz) can chicken broth
  • 1 large can salsa verde
  • 2 (16 oz) cans diced tomatoes (fire roasted or basil flavors are great)
  • 2 (15 oz) cans white beans, drained and rinsed
  • 1 lb shredded cooked chicken meat (rotisserie saves time, not money)
  • 1/2 large bag of frozen corn
  • 1/2 tsp dried oregano
  • 1/2 tsp ground coriander
  • 1/4 tsp ground cumin
  • pinch of salt and pepper
  • crunchy bread to serve along side is “optional”

Directions

  1. Heat oil on medium-high heat, and cook onion and garlic until soft
  2. Stir in broth, salsa verde, diced tomatoes, and spices.
  3. Bring to a boil, then simmer on low for about 10 minutes
  4. Add corn, chicken, and beans, and simmer for as long as possible to allow flavors to come together (20 minutes or more ideal)

This chili is SO good and very filling as well.  Despite how filling it is, I always go back for seconds.  And you will too.  Trust me.

So much has happened this week, I cannot wait to blog about it all.  Many exciting and scary changes ahead.  But for now… chili.

Skeptical and Surprised: Chickpea Curry

You know those recipes that you are so skeptical of as you are cooking it because something just doesn’t look right?  Why is the food that color?  What is that smell?  I’m really supposed to add that much red pepper flakes?

Those types of meals are often anxiety inducing because many times, they can very well turn out to be duds.  But sometimes, everything ends up coming together perfectly and all your doubts wash away.  (Very similar to other things in life, actually!)

I was SO skeptical of this recipe right up until the time I took my first bite.  Honestly, it did not look that good, and I was certain I was going to be disappointed.  Well, I was totally wrong!

Quick Chickpea Curry

Quick Chickpea Curry

My meatless monday recipe this week came from a completely random post I read on my WordPress Reader as I was browsing the food tag.  What caught my eye was the bloggers comment that even her boyfriend said ‘yum’.  And no joke, my boyfriend said the same thing when he ate it.

It is a Martha Stewart recipe for a chickpea curry, and man was it delicious.  I really wanted to share this insanely easy, cheap, and delicious recipe with you guys.

Quick Chickpea Curry

Adapted from this Martha Stewart Recipe

Yields: 4

You will Need:

  • 1 tablespoon olive oil
  • 1 large yellow onion, diced small
  • 3 garlic cloves, minced
  • 1 tablespoon curry powder
  • Pinch red pepper flakes
  • 1 tsp cumin
  • 1 cinnamon stick (3 inches)
  • Pinch of ground cloves
  • 2 cans (15 ounces each) no-salt-added chickpeas, rinsed and drained
  • 3 tablespoons ketchup
  • Coarse salt and ground pepper
  • Lemon wedges for serving

Directions:

  1.  In a large skillet, heat oil over medium-high heat.
  2. Add onion and cook, stirring occasionally, until beginning to brown, about 6-7 minutes.
  3. Add the garlic, curry, cinnamon, cloves, cumin, and red pepper flakes, and cook, stirring until fragrant, about 30 seconds.
  4. Add the chickpeas, ketchup, 1 tsp salt, 1/4 teaspoon of pepper, and 2 cups of water.
  5. Bring to a boil, reduce to a simmer, and cook covered for about 20 minutes.
  6. Uncover, increase heat to medium-high, and cook until sauce is slightly reduced, about 5-8 minutes.
  7. For best results, refrigerate overnight to allow flavors to come together.  *Do not drain any excess liquid, despite how much you may have.  This will reduce during storage and provide a great flavored sauce that is necessary.
  8. Reheat, and right before eating, drizzle some fresh lemon juice and stir well.

I had this chickpea curry mixed with brown rice for a complete, healthy meal.  It would also be great in a warm pita!  Or, simply served by itself  as a light meal or side dish.

Do not, and I repeat do not, skip the fresh lemon at the end.  I forgot this part during one plate of leftovers and I completely tasted the difference!

Now, go enjoy this recipe.  With the money you save on ingredients and the calories you save on your waistline, you are entitled to a nice fancy dessert ;)

Creamy Tomato Soup with Focaccia Croutons

The other night was just one of those days: rainy, cold, and dismal outside.  The weather was perfect for wearing pajamas at 5pm, cuddling with pets &/ significant others, and of course: making soup!

IMG_0691

I noticed on the Two Peas & Their Pod blog a recipe was posted for a healthier creamy tomato orzo soup, and I was immediately intrigued.  Especially because we had 1/2 loaf tomato basil focaccia bread left over that was way past its prime and destined to be made into croutons.

IMG_0693

I made this soup, with only two changes, and I was very impressed.  The creaminess comes from greek yogurt so it is actually a very healthy soup.  I highly encourage anyone who loves creamy tomato soup but hates the idea of slurping up 50% saturated fat in one bowel to try this recipe!

Creamy Tomato Soup with Focaccia Croutons

From: Two Peas and Their Pod Blog

Yield: 4 bowls

You Will Need:

  • 1 tablespoon olive oil
  • 1/2 cup chopped onion
  • 2 cloves garlic, minced
  • 2 bay leaves
  • 3-15 ounce cans diced tomatoes *
  • 1-15 ounce can vegetable broth
  • 1 teaspoon brown sugar
  • 1/4 cup chopped fresh basil *
  • Dash of crushed red pepper flakes
  • Salt and freshly ground black pepper, to taste
  • 1/2 cup plain Greek yogurt (we use Chobani)
  • 1 cup cooked Orzo pasta *
  • 1/2 loaf of stale focaccia bread for croutons (my addition, HIGHLY recommended)

* I used no salt added diced tomatoes and added my salt per our taste.  I did need to add a lot of salt to achieve a good flavor, but I still feel I added less than what would be in the regular sodium cans.

* I believe you could up the fresh basil a tad, maybe add in an extra  1 TBS.

* I substituted ALPHABET pasta instead of of orzo.  No, I don’t have a five year old.  I am just a kid at heart and the sight of this in the grocery store pretty much made my day.

Lastly, my own addition that pretty much MADE this soup amazing was the hommemade focaccia croutons.  See below for how to make these.

Now for the recipe:

1. In a large pot, heat the olive oil over medium heat. Add the onion and garlic and cook until tender, about 5 minutes. Stir in the bay leaves.

2. Add the tomatoes and vegetable broth. Stir in the brown sugar and fresh basil. Season with red pepper flakes, salt, and pepper, to taste. Simmer on low for 15 minutes.

3. Remove the bay leaves from the pot. Use an immersion blender to blend the soup (or blend the soup in a standing blender and return to the pot). Stir in the Greek yogurt until well combined. Stir in the orzo pasta (or alphabets). Serve warm.

And for the highly encouraged, totally worth it, absolutely delicious add in….

Tomato Basil Focaccia Croutons

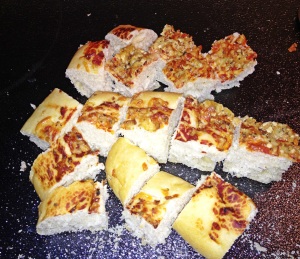
Like I mentioned, I had an extra 1/2 loaf of focaccia bread left over from making my roasted eggplant and tomato sandwiches, and it was getting very stale.  I made croutons out of the bread by simply cutting it up into thick cubes, combining with 1 TBS + 1 tsp olive oil, and sprinkling with a little salt (about 1/2 tsp).

IMG_0694

I then baked these beauties for about 10 minutes until they were nice and crispy.  I stored them in an air-tight container until dinner time when they met their fate by drowning in a bowel of creamy tomato soup.

IMG_0692

The next time you are craving a creamy, healthy, comforting soup, I definitely recommend you give this recipe a try.  I highly encourage the use of alphabets instead of orzo, because let’s face it: childhood favorite > random pasta that looks like rice ;)

And if you have a little extra time, whip up some homemade croutons for dunking.  You can never go wrong by adding more carbs!

What are your favorite healthy soup recipes?

Roasted Eggplant and Tomato Sandwich on Focaccia Bread- A Meatless Monday Recipe

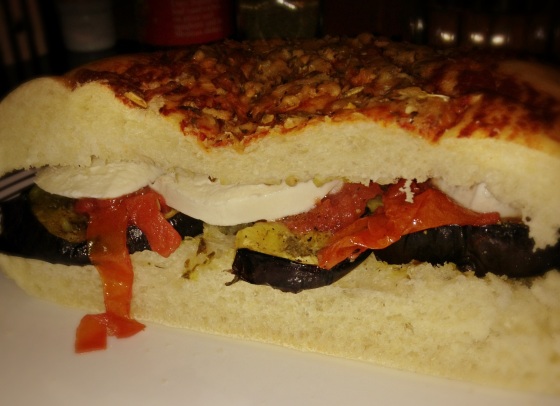
Roasted eggplant.  Roasted tomatos.  Fresh mozzarella.   Smothered in pesto and rosemary infused olive oil on focaccia bread.  Not missing the meat as much as you thought, huh?

IMG_0631

This recipe was adapted from a Rachel Ray recipe (I was unable to find it online- it’s from one of her cookbooks), but I added some of my own twists to it.  The simplicity of ingredients and the ease of the recipe enticed me to make this easy weeknight meal.  I wanted to share the recipe with you guys as well as my ideas for perfecting it.

Roasted Eggplant, Tomato, and Mozzarella Sandwich

Adapted from Rachel Ray’s “Look and Cook” Cookbook

Yield: 3-4 sandwiches

You will need:

  • One large eggplant, skin on, sliced in 1/2 inch slices
  • 2-3 large beefsteak tomatoes, sliced into thick pieces
  • One ball of fresh mozzarella cheese
  • One loaf focaccia bread, or 3-4 hoagie rolls
  • 2 TBS olive oil
  • 1 tsp Red pepper flakes
  • 2-3 cloves garlic, crushed
  • Rosemary (fresh preferred, dried fine as well), 1 tsp
  • 3-4 TBS pre-made pesto (bonus points to make your own)
  • 1 can low-fat tomato soup (optional side, highly recommend Amy’s brand)

Directions:

  1. Preheat oven to 425 degrees F.
  2. Line two baking sheets with foil and spray with non-stick cooking spray.
  3. Put 2 TBS olive oil in a pan and heat over low-medium heat.  Add the red pepper flakes, crushed garlic, & rosemary and allow the flavors to infuse on low heat for about 5-7 minutes.  IMG_0623
  4. Arrange the sliced eggplant on one baking sheet and the sliced tomatoes on the other.  Season both the eggplant and the tomato with salt and pepper on both sides.  Set the baking sheet with the tomatoes aside.
  5. Using a pastry brush or a spoon, lightly coat the eggplant slices with the infused olive oil on both sides.
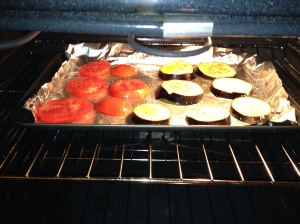
  6. Place the eggplant in the oven and allow to roast for 10-15 min minutes, until lightly brown and just beginning to shrivel.  About half way into the cooking time, add the baking sheet with the sliced tomatoes.  [Note: when I originally made this, I added the eggplant and the tomatoes at the same time and the tomatoes were overcooked, so I highly recommend separating them and baking them half way in]

IMG_0624

7.  While the vegetables roast, slice up the fresh mozzarella and cut the bread (if in loaf form).  At this point feel free to toast the bread by sticking it in the hot oven or in a toaster, if this is your preference.  We did not do this for the focaccia bread and wish we had.

8.Spread bread with a nice helping of prepared pesto.  Remove vegetables from the oven, layer on the bread, top with fresh mozzarella slices, and enjoy!

IMG_0630

IMG_0632

This recipe was very tasty!  Overall, I don’t think focaccia bread was the best choice- I think crusty rolls would have been more appropriate.  Not to throw anyone under the bus here, but the focaccia bread was my boyfriend’s idea ;)

The original recipe involves making a pistachio pesto with arugula, and topping the sammy with more arugala.  For times sake, we did not do this, but I do feel it could add a very interesting bite.

Also, I highly recommend more than just one layer of eggplant on the sandwich to make it more substantial.  Feel free to add more roasted veggies, as desired.  I think zucchini or roasted red peppers could add an interesting touch.

I am so proud of myself that for almost 2 months now I have been following meatless monday.  It’s such a fun twist on meals that I feel good about.

What are your favorite types of meals for Meatless Monday?

Baked Eggplant Parmesan- A Very Tasty Use of Leftovers

I made a dish the other night (to be posted for meatless monday) that left me with leftover eggplant and fresh mozzarella.  If that doesn’t scream eggplant parmesan, nothing does!  I knew I wanted to try a baked variety to keep this dish on the healthier side.  (Yes, I realize fresh mozzarella is not necessarily “light”, but that’s all the more reason to not fry the eggplant!)

IMG_0649

I consulted a couple of different recipes and came up with this adapted recipe.  It turned out DELICIOUS, so I wanted to pass the inspiration on to you guys.

Note: the trickiest part in posting this recipe comes with the baking times.  I found mine to require way less baking than suggested, probably because I only made this using the 1/2 eggplant I had leftover (only needed enough to feed two).  I am going to post this as I did it for two people, but if making it for more people just be aware that your baking times will be longer.

Baked Eggplant Parmesan for Two

(Adapted from this Martha Stewart recipe and this Whole Foods recipe)

You will need:

  • 1/2 a large eggplant, sliced into 1/2 inch slices
  • 6 TBS italian breadcrumbs
  • 6 TBS parmesan cheese, plus 1tsp divided
  • 1 large egg
  • 1 tsp water
  • pinch of dried oregano
  • pinch dried basil
  • about 1/2 ball fresh mozzarella, sliced thick and chopped into chunks (or you can use shredded mozarella, regular or 2%)
  • Salt and pepper (look at how much salt is in your breadcrumbs.. you may not need to add any)
  • Jarred marinara sauce (or homemade), about 1.5-2 cups, divided

Steps:

  1. In a medium bowl, mix the breadcrumbs,  6TBS parmesan cheese, oregano, and basil.  Transfer mixture to a flat surface such as a plate or cutting board.
  2. In a small bowel, combine the egg and 1 tsp water and lightly beat together.
  3. Line a large baking sheet (may require 2) with foil and spray with cooking spray.
  4. One by one, dunk each slice of eggplant into the egg, shake off excess, and then press firmly onto the breadcrumb mixture.  Turn the slice over and press firmly on the other side as well.  Transfer eggplant to lined baking dish.  Repeat for all eggplant slices.
  5. Bake the breaded eggplant in the oven on 375 degrees for about 15-20 minutes, and then turn them over.  Bake for another 10-15 minutes & remove from oven.  Keep a close eye on them at this point so they don’t burn.  Mine cooked for a total time of 30 minutes and they were perfectly brown.
  6. Line a 9X13 baking dish lightly with some marinara sauce, about 1/4 a cup or so.
  7. Transfer the breaded eggplant to the baking dish and layer with marinara sauce then fresh mozzarella cheese.  Keep repeating the eggplant-sauce-cheese layering process until all of your eggplant and cheese are used up.  Dust the top with a light coating of parmesan cheese, about 1 tsp (optional).

IMG_0648

8.  Bake at 410 degrees for 10-20 minutes, until cheese is beginning to brown and bubble.  Baking times vary- mine only required 10 minutes.

This recipe was so tasty, I highly encourage you guys to give it a try.  It can be a very healthy and filling meal if you use low fat mozzarella and pair with a nice big salad.  It is delicious enough for a date night in but easy enough for a weeknight meal as well.  This happens to be another one of those versatile recipes that will please kids, adults, vegetarians, and pretty much anyone that likes sauce and mozzarella cheese (i.e. EVERYONE!).

If you are cooking for two such as myself, on Monday I will be posting another great recipe to utilize the rest of the eggplant and mozzarella cheese, so stay tuned.

Have a great Saturday everyone!

Boyfriend-Approved Meatless Monday Recipe: Emeril’s Spicy Roasted Garlic Tomato Sauce

The Challenge: introducing Meatless Monday to a meat-loving boyfriend.

I have recently been loving the idea of Meatless Monday, as it forces me to be creative in the kitchen.  My boyfriend, however, is a hard core meat lover.  I don’t know if any of you are familiar with the TV show Parks and Rec, but my boyfriend shares the same food attitude as Ron Swanson.  Anyway, the point being that Meatless Monday is something I kind of slowly snuck into his diet without him knowing.  I simply prepare a delicious meal on Mondays, don’t use the word meatless around him, and we are good to go.  The challenge here is that the meal has to be really tasty, otherwise my cover will be revealed!

Homemade sauces are an easy and healthy way to be meatless, which is boyfriend approved because the meal is so filling once combined with pasta.

I loved the caramelized onion and cherry tomato sauce I made last week, but I wanted to try something a little different.  I got this recipe from the Food Network website, and we really loved it.  So, I wanted to share the recipe and my thoughts/tidbits with you.

I apologize for the poor photo quality.  This sauce was not oily or glistening as the picture makes it seem.  I think it may be time to start saving money for a good camera…

Spicy Roasted Garlic Tomato Sauce

Spicy Roasted Garlic Tomato Sauce

You Will Need:

1 large onion, chopped
3 tablespoons extra-virgin olive oil
1 tablespoon minced garlic
1/4 cup tomato paste
1 1/2 teaspoons salt
1 teaspoon balsamic vinegar
1/2 teaspoon hot sauce
1/4 teaspoon crushed red pepper
1/4 teaspoon Italian seasoning
1/4 teaspoon dried basil leaves
2 (28-ounce) cans whole Italian plum tomatoes, with their juices
3 whole heads roasted garlic [see “How To” note below], cloves removed from peels

How To Roast Garlic

Roasting garlic is a very easy, albeit time consuming, cooking skill.  I had actually never done this before, but I was only one google search away from mastering the skill.

Rather than confuse you with a lengthy step-by-step, I highly recommend that you watch this video.

Emeril’s (Spicy) Roasted Garlic Tomato Sauce Recipe:

[Yield: enough sauce to top about 3-4 pasta meals]

time: 1 hour 30 minutes + 30-40 minutes for roasting garlic

  1. In a large saucepan saute the onion in the olive oil over medium-high heat until soft and lightly golden, 4 to 6 minutes.
  2. Add the minced garlic and cook, stirring, for 1 minute.
  3. Add the tomato paste, salt, balsamic vinegar, hot sauce, crushed red pepper, Italian seasoning, and basil, and cook for 1 minute.
  4. Add the tomatoes, crushing with your hands as you place them in the pan, and their juices. [Note: do not add the actual tomato juice that the tomatoes are canned in!]
  5. Stir to combine well and bring to a boil. Reduce the heat to a slow simmer and cook for 20 minutes, stirring occasionally.
  6. Add the roasted garlic cloves and stir to combine. Continue to simmer for 30 to 45 minutes longer, or until the flavors have come together.
  7. Serve over pasta and enjoy!

My Thoughts & Tidbits

  • This sauce has kick to it!!  We were pretty surprised by how spicy it was, and we like spicy things.  I feel that the hotness of the red pepper flakes and the hot sauce overpowered the roasted garlic taste.  Next time I plan on reducing (or maybe even omitting) the red pepper flakes and adding 1-2 extra cloves of garlic.
  • The spiciness of the sauce did die down when it was re-heated for leftovers the next day.  The sauce was delicious this way, as all of the flavors came together perfectly.
  • This sauce pairs very nicely with whole wheat pasta.  I feel like some sauces are not powerful enough to mask the sometimes cardboard-y taste of WW pasta, but this one does the trick.  So go ahead, make it healthy and use the good-for-you stuff.
  • Note that the roasted garlic portion is 3 heads, not 3 cloves.  Yes, this is a lot of garlic!  Yes, you do need it all!
  • As previously noted, crush the tomatoes and their juices for the sauce, but do not add the actual juices that the tomatoes are canned in.
  • This sauce would taste amazing with some spicy chicken sausage in it.  Next time I make this without a vegetarian meal in mind, that is definitely what I will add!
  • This recipe is a bit time consuming between roasting the garlic and the steps in which the sauce simmers.  However, you are not actively engaged for much of this recipe.

This sauce was fantastic!  It is healthy, flavorful, versatile, and inexpensive.  This is a great base recipe for vegetarians, meat lovers, boyfriends, and even kids.  Next time you need an easy yet hearty meal, try this fresh, homemade tomato sauce!

Fresh and Easy: Tomato, Garlic, & Caramelized Onions Over Pasta

Monday night, despite an impending and untouched presentation I have due soon, I was in the mood to cook.  I wanted a meal that was 1) meatless (still loving meatless monday), 2) not complicated, and 3) healthy.

IMG_0561

Fresh cherry tomato, caramelized onions, and garlic sauce over pasta

Enter this recipe idea from Cristin’s RDealistic Diet Blog: a fresh cherry tomato, caramelized onion, and garlic sauce over pasta. I actually walked into the grocery store planning on making a different sauce recipe, but saw these gorgeous looking cherry tomatoes and knew I had to make use of them.

I followed her steps for the basic sauce and then spiced it up a little at the end.

What You Will Need

MIA: balsamic vinegar and olive oil

Missing in Action: balsamic vinegar and olive oil

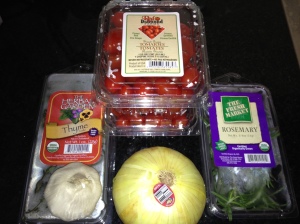
  • Two containers of delicious, sweet cherry tomatoes
  • One large vidalia onion, cut into rings or slices
  • 5 cloves fresh garlic, minced
  • 3 tablespoons EVOO, divided
  • Balsamic Vinegar (optional)
  • Chopped, fresh herbs (optional), I used thyme and rosemary
  • Cooked pasta, cooked according to package directions

Step 1:  Caramelize the onion

Cut one large Vidalia onion into rings or slices.  Place onion pieces into a pan that has been coated with 1-2 tablespoons of olive oil (or butter) and heated over low-medium heat.  Stir onions around pan to coat evenly with oil or butter.  Reduce heat to low and let onions simmer for 20-30 minutes, or until they are in a caramelized state. You can add about 1 tsp. brown sugar during the cooking process to help with the caramelizing but this step is not required.

Beginning

Beginning

Finished

Finished

Note- this is the longest part of cooking this meal, but you do not have to stand over the stove the entire time the onions caramelize.  Check in on them every now and then, give them a nice stir, and go about your business.  You will know they are finished when they are extremely soft and browning.

Step 2: Simmer the tomatoes

In a large, deep saucepan (I used the one the onions were caramelizing in) heat about 2 tablespoons of olive oil over medium heat.  (Note- if using the same pan as the onions were in, it will already be very hot.  Heat your oil over low instead, otherwise it will spritz up as well as burn the tomatoes).  Add your two containers of washed cherry tomatoes, and turn so the oil coats them all evenly. Adjust the heat between low and medium.  They should be hot and cooking, but not sizzling too high.

IMG_0555

Step 3:  Adding in the Goodies

This sauce can cook for any from 15-25 minutes, depending on how chunky or cooked down  you want the tomatoes in the sauce.  Either way, after 10 minutes of cooking the tomatoes, add all your chopped, fresh garlic.  At this point,

  • If you want a chunkier, thicker sauce with more whole tomatoes: let the tomatoes and garlic cook on low/medium heat for 5 minutes, turning now and then.
  • If you want a thinner sauce with the tomatoes shed from their skins: cook the garlic/tomatoes for up to 25 minutes, or until it is at your desired consistency.  Stir the mixture every five minutes or so.

During the last 5 minutes of your determined cooking time, add your caramelized onions.  Then, some optional (highly recommended) add- ins include:

  • About 1 tsp balsamic vinegar
  • 1-2 tsp fresh, chopped thyme or basil
  • 1-2 tsp fresh, chopped rosemary
  • Chicken sausage

I went with balsamic vinegar, thyme and rosemary, and it was the perfect, fresh combination.

IMG_0562

Step 5: Scoop over pasta and enjoy

IMG_0561

I served this alongside some Alexia baked mushrooms and roasted brussel sprouts (both not pictured).  This dinner was a huge success!  The progress on my project due soon?  Not so much..

I am loving the idea of homemade sauces and would love to know your favorite recipes!